Project Title: Nutrition in Food with Pictoblox Coding
Introduction:
Learn about the nutrients in food using Pictoblox coding! This interactive project helps you explore how different foods contribute to a healthy diet.

What are Nutrients?
Nutrients help our bodies grow, stay strong, and get energy. They are essential for good health.
Types of Nutrients
Carbohydrates - Provide energy (Rice, bread, potatoes).
Proteins - Build muscles (Eggs, fish, beans).
Fats - Store energy (Nuts, butter, oil).
Vitamins - Boost immunity (Fruits, vegetables).
Minerals - Strengthen bones (Milk, spinach).
Water - Keeps us hydrated.

Low Nutrient Foods:
Sugary Snacks - High sugar, low nutrients (Candy, sodas).
Fast Food - High in fats, sodium (Burgers, fries).
Processed Foods - Contain preservatives (Chips, instant noodles).
Sugary Drinks - Empty calories (Soft drinks, energy drinks).
Limiting these foods helps maintain a balanced diet.

Why Are Nutrients Important?
Provide energy.
Support growth.
Strengthen immunity.
Keep bones and teeth strong.
About PictoBlox:
Open: Start Pictoblox.
Add Sprites: Select different food items.
Use Blocks: Assign food to nutrient groups.
Run & Learn: Click to interact.

Pictoblox Coding for Food Nutrients:
Steps:
Open Pictoblox and create a new project.
Add food sprites like rice, milk, and eggs.
Categorize foods into nutrient groups using code blocks.
Program sprites to display nutrient info when clicked.
Run and interact with the project!
Circuit Setup (If Using Hardware):
Sprites: Represent food items.
Code Blocks: Control nutrient display.
Interactive Clicks: Show nutrient info.


❖Components:
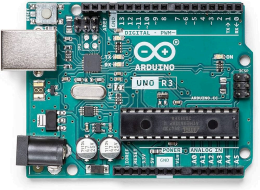
Arduino Uno:

Arduino is an open-source electronics platform based on easy-to-use hardware and software. It's intended for anyone making interactive projects.
• HC-05 Bluetooth Module:

The HC-05 is a popular and inexpensive Bluetooth module that allows wireless communication between devices. It's commonly used with microcontrollers like Arduino to add Bluetooth functionality to projects.
• Breadboard:

A breadboard is a solderless prototyping platform used for building temporary circuits for testing or experimentation. It's characterized by its rows of interconnected holes (called "tie points") that allow you to easily connect electronic components without soldering.
• LEDs:

• Jumper Wires:
Jumper wires are essential tools for anyone working with electronics, especially when prototyping circuits on a breadboard.
• Mobile/Laptop for input:

Arduino is an open-source electronics platform based on easy-to-use hardware and software. It's intended for anyone making interactive projects.
• HC-05 Bluetooth Module:
The HC-05 is a popular and inexpensive Bluetooth module that allows wireless communication between devices. It's commonly used with microcontrollers like Arduino to add Bluetooth functionality to projects.
• Breadboard:
A breadboard is a solderless prototyping platform used for building temporary circuits for testing or experimentation. It's characterized by its rows of interconnected holes (called "tie points") that allow you to easily connect electronic components without soldering.
• LEDs:
• Jumper Wires:
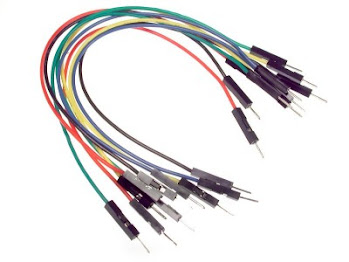
Jumper wires are essential tools for anyone working with electronics, especially when prototyping circuits on a breadboard.
• Mobile/Laptop for input:
How It Works – Simple & Interactive!
Type a nutrient like “Carbohydrates” on your device, and LEDs light up next to foods like tur dal, yogurt, and butter, instantly showing where to find them!
Step-by-Step Breakdown:
1. System Setup:
10 LEDs link to different food items.
An Arduino microcontroller manages the system.
A Bluetooth module enables wireless communication.
2. Query & Processing:
Enter a nutrient name on your laptop or phone.
The Arduino checks its database for matching foods.
3. LED Indication:
LEDs light up next to foods containing the nutrient.
Example: Typing “Carbohydrates” illuminates tur dal, yogurt, and butter.
Why This is Awesome!
A fun, effortless way to understand nutrition!
Simplified Algorithm:
Start
Initialize – Setup serial, Bluetooth, and LED pins.
Turn Off LEDs – Ensure all LEDs are off initially.
Loop Continuously:
Check for Bluetooth input.
Read & process received data.
Turn off all LEDs before lighting the correct one.
Match input and turn on respective LED:
'A' → Vitamin A (Pin 4)
'B' → Vitamin B (Pin 5)
'C' → Vitamin C (Pin 6)
'D' → Vitamin D (Pin 7)
'E' → Vitamin E (Pin 8)
'K' → Vitamin K (Pin 9)
Print "Invalid Input!" if unrecognized.
Repeat to check inputs continuously.
❖Program:
#include <Dabble.h>
#include <Servo.h>
void setup() {
Dabble.begin(9600);
pinMode(4, OUTPUT);
pinMode(5, OUTPUT);
pinMode(6, OUTPUT);
pinMode(7, OUTPUT);
pinMode(8, OUTPUT);
pinMode(9, OUTPUT);
pinMode(10, OUTPUT);
pinMode(11, OUTPUT);
pinMode(12, OUTPUT);
pinMode(13, OUTPUT);
}
void loop() {
//put your main code here, to run repeatedly:
Dabble.processInput();
if(Terminal.compareString("carb")) {
digitalWrite(4, true);
digitalWrite(5, false);
digitalWrite(6, false);
digitalWrite(7, false);
digitalWrite(8, false);
digitalWrite(9, false);
digitalWrite(10, false);
digitalWrite(11, false);
digitalWrite(12, true);
digitalWrite(13, false);
}
if(Terminal.compareString("lip")) {
digitalWrite(4, false);
digitalWrite(5, true);
digitalWrite(6, true);
digitalWrite(7, false);
digitalWrite(8, false);
digitalWrite(9, false);
digitalWrite(10, false);
digitalWrite(11, false);
digitalWrite(12, false);
digitalWrite(13, false);
}
if(Terminal.compareString("pro")) {
digitalWrite(4, false);
digitalWrite(5, false);
digitalWrite(6, false);
digitalWrite(7, true);
digitalWrite(8, true);
digitalWrite(9, false);
digitalWrite(10, false);
digitalWrite(11, false);
digitalWrite(12, false);
digitalWrite(13, false);
}
if(Terminal.compareString("vi")) {
digitalWrite(4, false);
digitalWrite(5, false);
digitalWrite(6, false);
digitalWrite(7, false);
digitalWrite(8, false);
digitalWrite(9, true);
digitalWrite(10, false);
digitalWrite(11, false);
digitalWrite(12, false);
digitalWrite(13, false);
}
if(Terminal.compareString("min")) {
digitalWrite(4, false);
digitalWrite(5, false);
digitalWrite(6, false);
digitalWrite(7, false);
digitalWrite(8, false);
digitalWrite(9, false);
digitalWrite(10, true);
digitalWrite(11, true);
digitalWrite(12, false);
digitalWrite(13, true);
}
}
Final output see like this :

Conclusion:
This project provides an interactive way to learn about nutrition, making healthy choices simple and engaging.
This project provides an interactive way to learn about nutrition, making healthy choices simple and engaging.
Comments
Post a Comment